Mr. Vaandering's Geology WebQuest
Here are the steps:
Click here to print out a checklist for these steps, including an approximate amount of time you should spend on each one.
Step #1

After your teacher places you in a team of 3, click here to see the letter from Mr. Yinnaire with the details about your task. Read through it together carefully!
Step #2

Let's find out how much you already know!
Open and print out this Anticipation Guide. Click here to access it. Read the directions. Be sure to talk with your team about each statement before you answer, and explain your answers below each statement!
Don't circle anything in the "After" column yet! We'll get to that later. For now, store this in your project folder.
Step #3

Time to start the research!
Click here to access and print out a Research Guide. Since there are three on a team, each student will take 2 pages, or a total of 8 landform types, to research. Decide how to divide up the pages between you.
Next, click here to learn how to do your research, how to use your Research Guide, and to locate online sites to get going!
Step #4

Time to take a video break!
Great job, so far! Now let's check your learning with a video about landforms. Click here to find a Video Viewing Guide; print one out for each team member.
In the first column, jot down some quick notes about what you remember about the landforms listed.
Then, watch the video. As you watch, you can add more notes to the second column. Feel free to pause the video any time.
Once the video is finished, meet up with your team and see if there's anything anyone missed. Try to make your notes as complete as possible!
Your teacher has the Discovery Education video loaded on the classroom computers.
Step #5
Let's check your understanding.
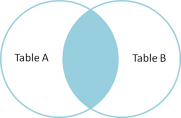
Some of the landforms you studied are very similar to other ones. Do you know the difference? In the following link, you'll find directions to create three different Venn Diagrams, one for each member of your team. See if you can compare and contrast the landforms listed there. You can use each other for help! Click here to create the Venn Diagrams.
Place these in your project folder when finished.
Step #6

Remember that Anticipation Guide? Let's pull that back out and see if you changed your mind about any of your answers. It should be in your project folder.
Reread each statement. Under the "After" column, circle whether you agree or disagree. If your "After" answer is different than your "Before" answer, write a little note to explain why.
When you're finished, place it back in your project folder to be turned in later.
Reread each statement. Under the "After" column, circle whether you agree or disagree. If your "After" answer is different than your "Before" answer, write a little note to explain why.
When you're finished, place it back in your project folder to be turned in later.
Step #7

Your research is done and you know your stuff! Great!
Now, take another look at those building requirements from Mr. Yinnaire.
Click here to see them. With your team, decide which landforms will meet the needs of the schools. You may wish to print them out and write your decisions on the backs.
Now, take another look at those building requirements from Mr. Yinnaire.
Click here to see them. With your team, decide which landforms will meet the needs of the schools. You may wish to print them out and write your decisions on the backs.
Step #8
You're ready to make your presentation for Mr. Yinnaire. Click here to view your choices and the details about how to design your presentation. Once you've looked over the choices, as a team decide which method you'd like to present your learning. Then, get started!
Step #9
Time to show off! It's your turn in the spotlight. Set a time with your teacher to show your work to the class. Print out enough Peer Evaluations for every classmate to fill out on your presentation (see Step #10 below). Each member of the team must be responsible for sharing his/her part of the project. When you present, you should:
When it's your turn to be the audience, remember to be respectfully quiet, pay close attention, ask thoughtful questions, and applaud! When the presentation is done, remember to fill out the Peer Evaluation (see Step #10).
- introduce yourselves
- display your work
- discuss the facts you learned
- suggest where Mr. Yinnaire's buildings should be located and explain why
- mention how you made your project
- answer no more than 3 questions from your classmates
When it's your turn to be the audience, remember to be respectfully quiet, pay close attention, ask thoughtful questions, and applaud! When the presentation is done, remember to fill out the Peer Evaluation (see Step #10).
Step #10

Anytime you do a project, it's important to reflect on the success of your work, your team's work, and the work of your classmates. It's helpful to know what worked well and what kinds of things need to be improved on for the next time. Below, you'll find links to different evaluation forms.
Click here to complete a Self Evaluation. Print it off and fill it out. This is when you get to grade yourself only. Be honest! When you're finished, you can place it in your project folder.
Click here to complete a Team Evaluation. Print it off and fill it out. This is when you grade your team members. Be sure to write honest, respectful statements about the quality of your team members' work. It goes in your project folder when finished.
Click here to print off Peer Evaluations for your classmates to fill out on your presentation. Be sure to print enough for the rest of your classmates.
When it's your turn to fill one out for someone else's presentation, be sure to write positive, respectful, and helpful statements! Turn these in immediately to the team that is presenting.
Last, but not least!

Please submit your project folders with all of your research, work, and evaluations included.
Congratulations! You're done!! Click here to celebrate!
Congratulations! You're done!! Click here to celebrate!
If you'd like to see how your final project will be graded by your teacher, click here.

Back to Task
